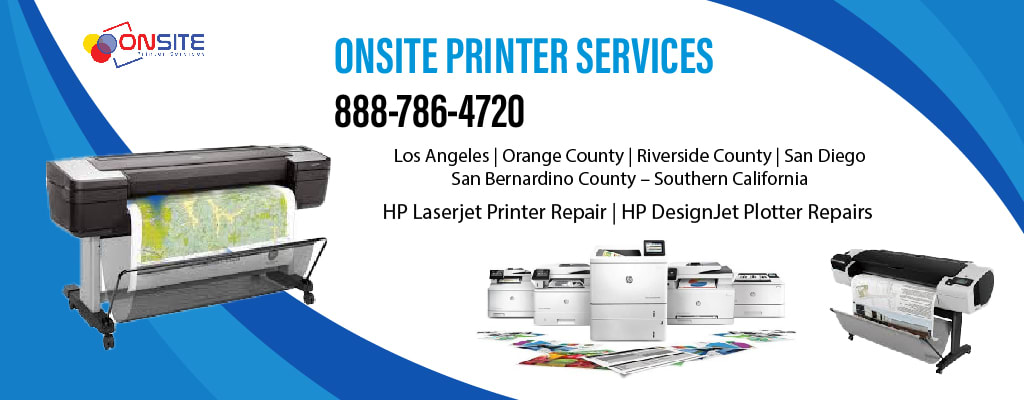
-->
We provide onsite service to HP LaserJet printer, MFP Printer, Color Printers in Culver City in Los Angeles County. Our Technicians are factory trained and certified. Our printer repair technicians provide fast, high-quality, on-site printer repairs. We are printer and plotter repair experts. Our technicians specialize in all aspects of printer problems including printer error codes, paper jams, image defects and hardware malfunctions. We don’t charge traveling to your location. Free maintenance cleaning done on every printer repair. We provide OEM HP toner cartridges. Free delivery to your location in Culver City, Ca.
If you have a problem with your laserjet printer, color HP laser jet, plotter wide format call us or email your details with a brief description of your problem. Our certified technician will respond with an estimate for the printer repair including parts and labor. We will deal with your query promptly and efficiently minimizing the downtime caused to your business.
2 Hour Response Time on Service Calls To Culver City,Ca
Culver City,Ca Printer Repair / Service common printer Problems
Culver City HP LaserJet Printer Repair / Services
Ontario HP Laser / LaserJet Black & White Printer Repair & Service
HP LaserJet 4200n, 4200dtn and 4200dtnsL printer repair | HP LaserJet 4250n and 4250tn printer repair |
HP LaserJet 4250 and 4250dtn printer repair | HP LaserJet 4300n, 4300tn and 4300dtn printer repair/repairs |
HP LaserJet 4350n, 4350tn and 4350dtn repair/repairs | HP LaserJet 5000n, 5000dn, 5000gn printer repair/repairs |
HP LaserJet 5100, 5100tn, 5100dtn printer repair | HP LaserJet 5200, 5200tn, 5200dtn printer repair |
HP Laser Jet 8000, HP 8000, 8000dn repair | HP LASERJET 8100, 8100n, 8100dn printer repair |
HP LASERJET, 8150n, 8150dn and 8150hn printer repair | HP LaserJet, 9000n, 9000dn and LJ 9000hns printer repair |
HP LASERJET 9040n and 9040dn Printer Repair | HP LASERJET 9050 and 9050n Printer Repair |
HP LASERJET 4050, 4050t, 4050tn printer repair | HP LASERJET P3005n and P300d5n printer repair service |
HP LaserJet P4014n and P-4014dn printer repair | HP LaserJet 4015n and P-4015dtn Printer Repairs |
HP LASERJET P2015 and P2015n printer repair service | HP LaserJet P4014/P-4014 printer repair |
HP LaserJet P4015/P-4015 Printer Repairs | HP LASERJET P3015, P3015n printer repair service |
HP LaserJet P4015/P-4015 series printer repair | HP LaserJet P4015/P-4015 series printer repair |
HP LaserJet Enterprise 600 Printer – m60dn repair | HP LaserJet Enterpise 600 printer –M602n repair |
HP LaserJet Enterprise 600 printer M602dn repair | HP LaserJet Enterprise 700 M712dn printer repair |
Culver City,Ca Printer Error codes
HP Printer Error Codes | HP Laser Printer Error Code |
13 paper jam/Jamming | Paper accordion |
14 No EP Cartridge | Paper Jam in the tray |
Squeeking Noise | Grinding Noise |
Fuser paper jam error | Repeating dots |
User Maintenance Error | High pitch Noise |
Laser Printer Maintenance Error | 49 4C06 error |
Vertical lines | 49 4C02 error |
12 printer open | 49 0000ff error |
13.A paper jam | Error 49 |
13.1 paper pickup jam | Error 50 service |
13.2 paper jam | 50 Service Error |
13.3 paper jam | 50.1 Fuser or P/S failure (HP 8100) |
13.4 paper jam | 50.1 Bad Low Voltage Power Supply |
13.5 Paper jam in the fuser | 50.2 Fuser Error |
13.6 Paper jam in the fuser | 50.5 Fuser Error |
13.20 jam in the paper feed drive | 50.9 Fuser Error |
13.10 duplex paper jam | Error 52 Beam Detect Error |
13.14 paper jam | Hp 4500 54.2 Carousel Drive Motor Error |
51 (Beam Detect Error) | 54.xx density out of range (HP 5500) |
52 Error (Scanner Failure) | Close front top cover error (CLJ 9550) |
Printing blotches | close bottom left cover error (CLJ 9500) |
Printing Blank pages | 57.6 fan error (CLJ 9500/9550) |
Printing Black Pages | 57.7 fan error (HP CLJ 9500/9550) |
Vertical Lines | 59.9 Transfer Belt Error |
Printer not printing at all | 59.40 Fuser error |
Paper wrinkle | 16 Toner Low |
Paper jam in the tray | No image on the paper |
Paper jam at the exit | 30.1.19 FlatBed Scanner error |
Not printing/No print | Print Defect |
Blank Pages | Black Pages |
Image Defect | vertical lines/horizontal line |
Culver City, Ca HP LaserJet Printer Cleaning
By cleaning your HP laser printers, you’re sure to lengthen your printer’s life and avoid the troubles of printer malfunction caused by not performing the task mentioned. Most printer users tend to search the internet on how-to’s but end up finding complicated steps that’s why in this article, we’re going to show you three ways on how to clean that HP laser printer as easy as a piece of cake.
Laser printers contain many moving, mechanical parts and require regular maintenance to ensure reliable performance.
This troubleshooting information is intended only as a guide in determining the most common faults with laser printers and should not be used as an alternative to service provided by experienced technicians.
May be caused by the toner cartridge running low. Try a new toner cartridge , or to get a little more life from the toner cartridge, remove it carefully from the printer and give it a gentle shake from side-to-side. Also ensure that ‘economy mode’ is not selected. If a replacement toner cartridge does not fix the problem, a printer service is required.
Ensure all electrical cables are securely connected and that printer covers and doors are closed properly. Power supply units and electronic boards can also fail on laser printers, and can be replaced by a technician.
Power down the printer and wait for 30 seconds before powering up the printer. This will clear the buffer or memory in the printer. Purge any documents in the print queue waiting to print via your computer. Resend the print job to determine whether the problem is resolved.
Vertical or horizontal marks on the page are generally caused by the toner cartridge. Try a different toner cartridge (new or empty) to determine whether the marks are repeated. If a replacement toner cartridge does not fix the problem, a printer service is required.
Pages printing out completely black indicate a printer service is required. They are usually caused by a fault with the laser scanner assembly which will need replacement or cleaning by a technician.
Can be caused by incorrectly fitted toner cartridge. Ensure that the plastic rip-strip is removed from the toner cartridge.
Remove toner cartridge and paper trays from printer to expose paper jam. Remove paper from the printer by gently pulling the paper in the direction of the paper flow. Remove any torn paper or foreign objects from around the area of the jam. Phantom paper jams; continuous paper jamming or multiple page feeding indicates a printer service is required.
Fusers and/or fixing assemblies are moving parts inside laser printers and periodically require maintenance or replacement. Turn off the printer and let it stand idle for about 30 minutes. Power up again to determine whether the error message has cleared. If the service 50 error is still present, a printer service is required.
If a 13 PAPER JAM or 13 DUPLEX JAM message appears in the display panel, look for jammed paper in any of the locations. If you get repeated paper jams or if the paper jam message appears repeatedly, see ” Repeated Paper Jams” at the end of this section. Paper jams occur most often when:
Note
The top cover or rear cover of the printer must be opened and then closed in order to clear the paper jam message. If paper jams occur frequently, clean the printer and check the quality of your paper or other print media.
Paper Jams: Paper Pickup and Transfer Guide Areas
Note
Do not force the paper. If you can see paper in the cassette opening but cannot remove it easily, remove the paper through the Transfer Guide Area (see next steps)
Paper Jams: Fusing Assembly Area – Top Cover
Note
If loose toner falls into the fuser, it may cause print quality problems
If toner gets on your clothes, wipe it off with a dry cloth and wash your clothes in cold water. Hot water sets toner into fabric.
Paper Jams: Rear Cover – Fusing Assembly and Paper Exit Areas
Warning
The fusing area gets HOT.
Note
Make sure that the orange packing spacers have been removed from the fusing assembly.
Paper Jams: 500-sheet Lower Cassette
Note
If there are frequent paper jams or multi-feed problems in the lower cassette area, see “Printing from the OPtional lOwer Cassette” and ” Repeated Paper Jams” at the end of this section.
Paper Jams: Optional Duplex Unit
Repeated Paper Jams: Situations and Solutions
Repeated Paper Jams: Situations and Solutions | |
Situation | Solution |
General repeated paper jam problems. |
|
Multipurpose (MP) Tray repeated jams. | If jams persist after you have cleaned the printer, check the media specifications and verify that you are loading the Multipurpose (MP) tray correctly (see Chapter 3 “Printing Tasks”). You may need to replace the Multipurpose (MP) Tray Pickup Roller as described in Chapter 7. |
Paper Cassette repeated jams. | If jams persist after you have cleaned the printer, check the media specifications and verify that you are loading the Multipurpose (MP) tray correctly (see Chapter 3 ” Printing Tasks”). You may need to replace the Multipurpose (MP) Tray Pickup Roller as described in Chapter 7. If using the universal (adjustable) Paper Cassette, verify that the paper size knob and other adjustments are set correctly and that the tray is not overloaded. |
Lower Cassette repeated jams (not applicable at ING). | Adjust the Lower Cassette as described in “Printing from the Optional Lower Cassette ” in Chapter3. Verify that the paper size, tension, and other adjustments are set correctly and that the tray is not overloaded. If two or more pieces of media are being selected at once, it may help to decrease the tension (turn the adjustment clockwise). If the media is not being picked up from the tray, increase the tension (turn the adjustment counterclockwise). |
General causes of print quality problems are given in the checklist below, followed by specific samples of common print quality problems. If the listed solutions do not work, call for help.
If a vertical white streak or faded area appears on the page:
If faded-out areas, generally rounded, occur randomly on the page:
If sharp black vertical streaks appear on the page, the photosensitive drum inside the toner cartridge has probably been scratched. Replace the toner cartridge.
If smeared black vertical streaks appear, the fuser may be bad. Inspect the rollers for scratches and excessive wear, and, if necessary, replace the fusing assembly as described in ‘User-Replaceable Parts’ in Chapter 7.
If toner smears appear on the leading edge of the paper, the paper guides are dirty. Clean the printer as described in ‘Cleaning the Printer’ in Chapter 7.
If toner on the paper is loose or can be wiped off easily, your fuser may be damaged. See your service representative.
If the amount of background toner shading becomes unacceptable, the procedures described below may help to clear the condition:
If marks appear repeatedly on the printed side of the page:
If characters are improperly formed, producing hollow characters, your paper stock mat be too slick. Try a different paper.
If characters are improperly formed, producing a wavy effect, the laser scanner needs service. Call your authorized HP dealer or HP service representative
Vertical Line at Edge of Paper
If a vertical line appears on the page’s margin (usually the right margin) after printing about 10,000 pages, the drum in your toner cartridge is wearing out. The line will grow wider, with cross-hatching. Replace the toner cartridge. Shaking the cartridge will not temporarily relieve the problem.
Printer & HP DesignJet Repair in Culver City 90066 | 90230 | 90231 | 90232 | 90233 | 90292
Printer Repair Culver City, Printer Service Culver City, Culver City Printer Repair , Laserjet Printer Repair Culver City , Culver City HP Repair Center, HP LaserJet Printer Repair Culver City , Culver City Printer Cleaning, Culver City HP Toner Cartridge Delivery, Culver City Printer Repair Center, HP Color Printer Repair Culver City ,HP MFP Printer Repair Culver City
Culver City
City in California
Culver City, soaked in moviemaking history, features a buzzing dining and nightlife scene, which includes globally inspired eateries, gastropubs and cozy cocktail bars. Occupying the MGM lot, which dates back to 1924, Sony Pictures Studios offers behind-the-scenes tours of its legendary soundstages. Other cultural highlights include spare but sophisticated art galleries, playhouses and the storied Culver Hotel.