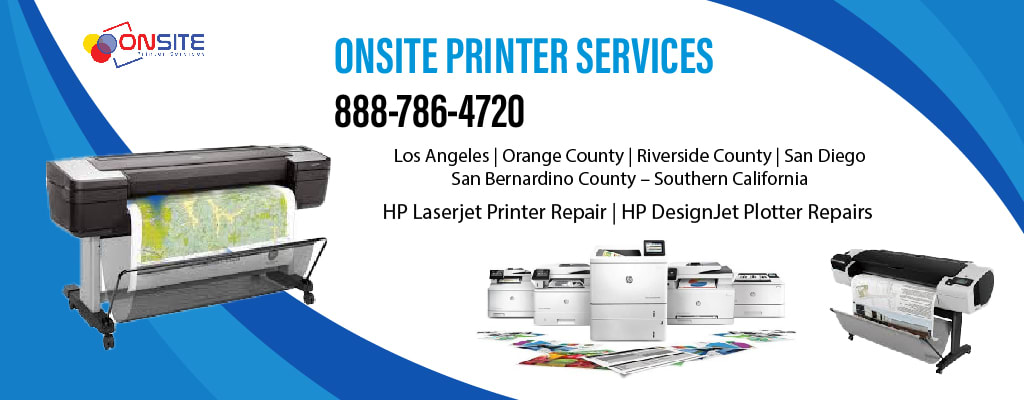
HP DesignJet Plotter Z6200 Repair Los Angeles
HP DesignJet Z6200 Repair | Service | Maintenance | Cleaning

Plotter or Large Format Printer problems we can fix:
- Carriage belt replacement
- Broken carriage belt
- Print-head error
- Ink supply error
- Paper not cutting
- Noise
- Error code
- No power faulty power supply
Same-day onsite HP designjet repair includes inspectin, cleaning, lubricating and print head calibration
- Clean plotter Carriage Rails.
- Lubricate the plotter Carriage Rails.
- Cleaning the Drive Roller.
- Encoder Strip Cleaning and inspection.
- Inspect and Clean Platen Assembly.
- Clean the complete Hewlett Packard LaserJet.
- Adjust the designjet print head after exchanging the belt.
- Quality test printout.
HP DesignJet Z6200 Error Codes
Code: 01.0:10
Description: Main PCA hardware failure
Remedy:
Turn the power off at the rear of the printer and disconnect the power cord. Reconnect the power cord and turn on the printer. Replace the Main PCA Main PCA.
Code: 01.1:10
Description: PrintMech PCA hardware failure
Remedy:
Turn the power off at the rear of the printer and disconnect the power cord. Reconnect the power cord and turn on the printer. Replace the PrintMech PCA PrintMech PCA.
Code: 01.2:10
Description: ISS Top PCA communication failure
Remedy:
Turn the power off at the rear of the printer and disconnect the power cord. Reconnect the power cord and turn on the printer. Replace the Ink Supply Tubes and Trailing Cable. NOTE: If the Ink Supply Tubes are to be replaced, the Ink Cartridges need to be checked beforehand to see if they are capable of purging the new tubes. If they are not, new Ink Cartridges must also be sent with the parts to be replaced. To check the Ink Cartridges, go to Check ink supplies.
Code: 01.3:10
Description: ISS Bottom PCA communication failure
Remedy:
Turn the power off at the rear of the printer and disconnect the power cord. Reconnect the power cord and turn on the printer. • Replace the Ink Supply Tubes and Trailing Cable. NOTE: If the Ink Supply Tubes are to be replaced, the Ink Cartridges need to be checked beforehand to see if they are capable of purging the new tubes. If they are not, new Ink Cartridges must also be sent with the parts to be replaced. To check the Ink Cartridges, go to Check ink supplies.
Code: 02.1:10
Description: Carriage PCA communication failure
Remedy:
Turn the power off at the rear of the printer and disconnect the power cord. Reconnect the power cord and turn on the printer. Check that the Trailing Cable is not damaged. Check that the Trailing Cable is correctly connected to the Carriage PCA, Interconnect PCA and Main PCA. Replace the Carriage PCA Carriage PCA.
Code: 03:10
Description: Power distribution failure
Remedy:
Turn the power off at the rear of the printer and disconnect the power cord. Reconnect the power cord and turn on the printer. If the Power Supply Unit’s blue LED is on, replace the PrintMech PCA. If not, replace the Power Supply Unit.
Code: 05.1:10
Description: Formatter CPU fan stopped or burnt
Remedy:
Turn the power off at the rear of the printer and disconnect the power cord. Reconnect the power cord and turn on the printer. If the system error persists, replace the Formatter Formatter.
Code: 05:10
Description: Formatter communication failure with ISS
Remedy:
Turn the power off at the rear of the printer and disconnect the power cord. Reconnect the power cord and turn on the printer. Check that the Formatter to PrintMech PCA cable is correctly connected. If the system error persists, replace the Formatter Formatter.
Code: 06:03
Description: Main NVM communication failure
Remedy:
Turn the power off at the rear of the printer and disconnect the power cord. Reconnect the power cord and turn on the printer. If the System Error continues, replace the Hard Disk Drive Hard Disk Drive (HDD).
Code: 06:10
Description: Main NVM communication failure
Remedy:
Turn the power off at the rear of the printer and disconnect the power cord. Reconnect the power cord and turn on the printer. If the System Error continues, replace the Hard Disk Drive Hard Disk Drive (HDD).
Code: 08:11
Description: Front Panel communication failure
Remedy:
Turn the power off at the rear of the printer and disconnect the power cord. Reconnect the power cord and turn on the printer. See What to do if the front panel is blank.
Code: 11:10
Description: Trailing Cable does not seem to be connected
Remedy:
Check that the Trailing Cable is not damaged. Check that the Trailing Cable is correctly connected to the Carriage PCA, Interconnect PCA and Main PCA. Replace the Ink Supply Tubes and Trailing Cable. NOTE: If the Ink Supply Tubes are to be replaced, the Ink Cartridges need to be checked beforehand to see if they are capable of purging the new tubes. If they are not, new Ink Cartridges must also be sent with the parts to be replaced. To check the Ink Cartridges, go to Check ink supplies.
Code: 17.0:11
Description: PrintMech to Interconnect Power cable does not seem to be connected
Remedy:
Check that the PrintMech to Interconnect Power cable is not damaged. Check that the PrintMech to Interconnect Power cable is correctly connected to the PrintMech PCA and the Interconnect PCA. Replace the PrintMech to Interconnect Power cable (which is included in the Electronics Module Cable Kit).
Code: 17.1:11
Description: PrintMech to Interconnect Data 1 cable does not seem to be connected
Remedy:
Check that the PrintMech to Interconnect Data 1 cable is not damaged. Check that the PrintMech to Interconnect Data 1 cable is correctly connected to the PrintMech PCA and the Interconnect PCA. Replace the PrintMech to Interconnect Data 1 cable (which is included in the Electronics Module Cable Kit).
Code: 17.2:11
Description: PrintMech to Interconnect Data 2 cable does not seem to be connected
Remedy:
Check that the PrintMech to Interconnect Data 2 cable is not damaged. Check that the PrintMech to Interconnect Data 2 cable is correctly connected to the PrintMech PCA and the Interconnect PCA. Replace the PrintMech to Interconnect Data 2 cable (which is included in the Electronics Module Cable Kit).
Code: 17.3:11
Description: Main PCA to PrintMech Black 1 cable does not seem to be connected
Remedy:
Check that the Main PCA to PrintMech Black 1 cable is not damaged. Check that the Main PCA to PrintMech Black 1 cable is correctly connected to the Main PCA and the PrintMech PCA. Replace the Main PCA to PrintMech Black 1 cable (which is included in the Electronics Module Cable Kit).
Code: 17.4:11
Description: Main PCA to PrintMech Blue 2 cable does not seem to be connected
Remedy:
Check that the Main PCA to PrintMech Blue 2 cable is not damaged. Check that the Main PCA to PrintMech Blue 2 cable is correctly connected to the Main PCA and the PrintMech PCA. Replace the Main PCA to PrintMech Blue 2 cable (which is included in the Electronics Module Cable Kit).
Code: 21:03
Description: Service Station electrical current limit
Remedy:
Turn the power off at the rear of the printer and disconnect the power cord. Reconnect the power cord and turn on the printer. Make sure that the Service Station path is clear. Remove any visible obstacles (such as foam from the printers packaging, screws and plastic parts) restricting the movement of the Service Station. If the System Error continues, replace the Service Station Service Station.
Code: 21:13
Description: Service Station jam
Remedy:
Turn the power off at the rear of the printer and disconnect the power cord. Reconnect the power cord and turn on the printer. Make sure that the Service Station path is clear. Remove any visible obstacles (such as foam from the printers packaging, screws and plastic parts) restricting the movement of the Service Station. If the System Error continues, replace the Service Station Service Station.
Code: 23:10
Description: Air Pressurization System failure; unable to pressurize or depressurize tubes
Remedy:
Turn the power off at the rear of the printer and disconnect the power cord. Reconnect the power cord and turn on the printer. Check that the APS cable is not damaged and is correctly connected to the PrintMech PCA. Check that the air tubes are properly connected and are not kinked or pinched. Replace the APS Assembly APS Assembly.
Code: 24.1:11
Description: ISS Top to ISS Bottom cable does not seem to be connected
Remedy:
Check that the ISS Top to ISS Bottom cable cable is not damaged. Check that the ISS Top to ISS Bottom cable is correctly connected to the ISS Top PCA and ISS Bottom PCA. Replace the ISS Top to ISS Bottom cable (which is included in the Electronics Module Cable Kit).
Code: 24:03
Description: Ink Supply Tubes purge failure
Remedy:
Turn the power off at the rear of the printer and disconnect the power cord. Reconnect the power cord and turn on the printer. Ensure that the dummy printheads are correctly installed and purge the Ink Supply Tubes again. If the problem persists, replace the Setup Printhead Kit.
Code: 24:10
Description: A broken bag has been detected in one of the Ink Cartridges
Remedy:
Press Down + Cancel to see which cartridges have a broken bag. Remove the affected cartridges, shake each one three times within 2 seconds through a distance of about 40 cm, and check whether the cartridge air tower is contaminated with ink. If at least one cartridge is contaminated, replace the Ink Supply Tubes and Trailing Cable Ink Supply Tubes and Trailing Cable. NOTE: If the Ink Supply Tubes are to be replaced, the Ink Cartridges need to be checked beforehand to see if they are capable of purging the new tubes. If they are not, new Ink Cartridges must also be sent with the parts to be replaced. To check the Ink Cartridges, see Check ink supplies. If no cartridge seems contaminated, follow the broken bag recovery procedure for more information Recover broken bag.
Code: 24:11
Description: PrintMech to ISS Top cable does not seem to be connected
Remedy:
Check that the PrintMech to ISS Top cable cable is not damaged. Check that the PrintMech to ISS Top cable is correctly connected to the PrintMech PCA and ISS Top PCA. Replace the PrintMech to ISS Top cable (which is included in the Electronics Module Cable Kit).
Code: 26.0:01
Description: Bad contact detected in ISS slot 0 floater
Remedy:
Remove the Magenta Ink Cartridge and reinstall it into the printer. Replace the Magenta Ink Cartridge. Check that the ISS to Cartridge cable (Magenta Ink Cartridge) is not damaged and is correctly connected to the Ink Supply Tubes PCA. Replace the ISS to Cartridge cable (Magenta Ink Cartridge) ISS to Cartridge Cables.
Code: 26.1:01
Description: Bad contact detected in ISS slot 1 floater
Remedy:
Remove the Light Magenta Ink Cartridge and reinstall it into the printer. Replace the Light Magenta Ink Cartridge. Check that the ISS to Cartridge cable (Light Magenta Ink Cartridge) is not damaged and is correctly connected to the Ink Supply Tubes PCA. Replace the ISS to Cartridge cable (Light Magenta Ink Cartridge) ISS to Cartridge Cables.
Code: 26.2:01
Description: Bad contact detected in ISS slot 2 floater
Remedy:
Remove the Photo Black Ink Cartridge and reinstall it into the printer. Replace the Photo Black Ink Cartridge. Check that the ISS to Cartridge cable (Photo Black Ink Cartridge) is not damaged and is correctly connected to the Ink Supply Tubes PCA. Replace the ISS to Cartridge cable (Photo Black Ink Cartridge) ISS to Cartridge Cables.
Code: 26.3:01
Description: Bad contact detected in ISS slot 3 floater
Remedy:
Remove the Matte Black Ink Cartridge and reinstall it into the printer. Replace the Matte Black Ink Cartridge. Check that the ISS to Cartridge cable (Matte Black Ink Cartridge) is not damaged and is correctly connected to the Ink Supply Tubes PCA. Replace the ISS to Cartridge cable (Matte Black Ink Cartridge) ISS to Cartridge Cables.
Code: 26.4:01
Description: Bad contact detected in ISS slot 4 floater
Remedy:
Remove the Yellow Ink Cartridge and reinstall it into the printer. Replace the Yellow Ink Cartridge. Check that the ISS to Cartridge cable (Yellow Ink Cartridge) is not damaged and is correctly connected to the Ink Supply Tubes PCA. Replace the ISS to Cartridge cable (Yellow Ink Cartridge) ISS to Cartridge Cables.
Code: 26.5:01
Description: Bad contact detected in ISS slot 5 floater
Remedy:
Remove the Light Cyan Ink Cartridge and reinstall it into the printer. Replace the Light Cyan Ink Cartridge. Check that the ISS to Cartridge cable (Light Cyan Ink Cartridge) is not damaged and is correctly connected to the Ink Supply Tubes PCA. Replace the ISS to Cartridge cable (Light Cyan Ink Cartridge) ISS to Cartridge Cables.
Code: 26.6:01
Description: Bad contact detected in ISS slot 6 floater
Remedy:
Remove the Light Gray Ink Cartridge and reinstall it into the printer. Replace the Light Gray Ink Cartridge. Check that the ISS to Cartridge cable (Light Gray Ink Cartridge) is not damaged and is correctly connected to the Ink Supply Tubes PCA. Replace the ISS to Cartridge cable (Light Gray Ink Cartridge) ISS to Cartridge Cables.
Code: 26.7:01
Description: Bad contact detected in ISS slot 7 floater
Remedy:
Remove the Red Ink Cartridge and reinstall it into the printer. Replace the Red Ink Cartridge. Check that the ISS to Cartridge cable (Red Ink Cartridge) is not damaged and is correctly connected to the Ink Supply Tubes PCA. Replace the ISS to Cartridge cable (Red Ink Cartridge) ISS to Cartridge Cables.
Code: 27.1:01
Description: Calibration failed to due to poor performance of the Magenta/Yellow Printhead in slot 1
Remedy:
This may impact your print quality. If it becomes unacceptable in the future, clean all printheads and check their status.
Code: 27.2:01
Description: Calibration failed to due to poor performance of the Magenta/Yellow Printhead in slot 2
Remedy:
This may impact your print quality. If it becomes unacceptable in the future, clean all printheads and check their status.
Code: 27.3:01
Description: Calibration failed to due to poor performance of the Light Cyan/Light Magenta Printhead slot 3
Remedy:
This may impact your print quality. If it becomes unacceptable in the future, clean all printheads and check their status.
Code: 27.4:01
Description: Calibration failed to due to poor performance of the Light Cyan/Light Magenta Printhead in slot 4
Remedy:
This may impact your print quality. If it becomes unacceptable in the future, clean all printheads and check their status.
Code: 27.5:01
Description: Calibration failed to due to poor performance of the Photo Black/Light Gray Printhead in slot 5
Remedy:
This may impact your print quality. If it becomes unacceptable in the future, clean all printheads and check their status.
Code: 27.6:01
Description: Calibration failed to due to poor performance of the Photo Black/Light Gray Printhead in slot 6
Remedy:
This may impact your print quality. If it becomes unacceptable in the future, clean all printheads and check their status.
Code: 27.7:01
Description: Calibration failed to due to poor performance of the Matte Black/Red Printhead in slot 7
Remedy:
This may impact your print quality. If it becomes unacceptable in the future, clean all printheads and check their status.
Code: 27.8:01
Description: Calibration failed to due to poor performance of the Matte Black/Red Printhead in slot 8
Remedy:
This may impact your print quality. If it becomes unacceptable in the future, clean all printheads and check their status.
Code: 28.1:01
Description: Magenta/Yellow Printhead in slot 1 is deteriorating
Remedy:
This may impact your print quality. If it becomes unacceptable in the future, replace that printhead with a new one. NOTE: This system error appears only after the printhead is out of warranty.
Code: 28.1:02
Description: Magenta/Yellow Printhead in slot 1 nearing the end of its useful life
Remedy:
This printhead may have reached a degradation level that prevents the printer from producing acceptable prints consistently. If it becomes unacceptable in the future, run the Clean (Recover) Printhead procedure. NOTE: This system error appears only after the printhead is out of warranty.
Code: 28.2:01
Description: Magenta/Yellow Printhead in slot 2 is deteriorating
Remedy:
This may impact your print quality. If it becomes unacceptable in the future, replace that printhead with a new one. NOTE: This system error appears only after the printhead is out of warranty.
Code: 28.2:02
Description:
Magenta/Yellow Printhead in slot 2 nearing the end of its useful life
Remedy:
This printhead may have reached a degradation level that prevents the printer from producing acceptable prints consistently. If it becomes unacceptable in the future, run the Clean (Recover) Printhead procedure. NOTE: This system error appears only after the printhead is out of warranty.
Code: 28.3:01
Description: Light Cyan/Light Magenta Printhead in slot 3 is deteriorating
Remedy:
This may impact your print quality. If it becomes unacceptable in the future, replace that printhead with a new one. NOTE: This system error appears only after the printhead is out of warranty.
Code: 28.3:02
Description: Light Cyan/Light Magenta Printhead in slot 3 nearing the end of its useful life
Remedy:
This printhead may have reached a degradation level that prevents the printer from producing acceptable prints consistently. If it becomes unacceptable in the future, run the Clean (Recover) Printhead procedure. NOTE: This system error appears only after the printhead is out of warranty.
Code: 28.4:01
Description: Light Cyan/Light Magenta Printhead in slot 4 is deteriorating
Remedy:
This may impact your print quality. If it becomes unacceptable in the future, replace that printhead with a new one. NOTE: This system error appears only after the printhead is out of warranty.
Code: 28.4:02
Description: Light Cyan/Light Magenta Printhead in slot 4 nearing the end of its useful life
Remedy:
This printhead may have reached a degradation level that prevents the printer from producing acceptable prints consistently. If it becomes unacceptable in the future, run the Clean (Recover) Printhead procedure. NOTE: This system error appears only after the printhead is out of warranty.
Code: 28.5:01
Description: Photo Black/Light Gray Printhead in slot 5 is deteriorating
Remedy:
This may impact your print quality. If it becomes unacceptable in the future, replace that printhead with a new one. NOTE: This system error appears only after the printhead is out of warranty.
Code: 28.5:02
Description: Photo Black/Light Gray Printhead in slot 5 nearing the end of its useful life
Remedy:
This printhead may have reached a degradation level that prevents the printer from producing acceptable prints consistently. If it becomes unacceptable in the future, run the Clean (Recover) Printhead procedure. NOTE: This system error appears only after the printhead is out of warranty.
Code: 28.6:01
Description: Photo Black/Light Gray Printhead in slot 6 is deteriorating
Remedy:
This may impact your print quality. If it becomes unacceptable in the future, replace that printhead with a new one. NOTE: This system error appears only after the printhead is out of warranty.
Code: 28.6:02
Description: Photo Black/Light Gray Printhead in slot 6 nearing the end of its useful life
Remedy:
This printhead may have reached a degradation level that prevents the printer from producing acceptable prints consistently. If it becomes unacceptable in the future, run the Clean (Recover) Printhead procedure. NOTE: This system error appears only after the printhead is out of warranty.
Code: 28.7:01
Description: Matte Black/Red Printhead in slot 7 is deteriorating
Remedy:
This may impact your print quality. If it becomes unacceptable in the future, replace that printhead with a new one. NOTE: This system error appears only after the printhead is out of warranty.
Code: 28.7:02
Description: Matte Black/Red Printhead in slot 7 nearing the end of its useful life
Remedy:
This printhead may have reached a degradation level that prevents the printer from producing acceptable prints consistently. If it becomes unacceptable in the future, run the Clean (Recover) Printhead procedure. NOTE: This system error appears only after the printhead is out of warranty.
Code: 28.8:01
Description: Matte Black/Red Printhead in slot 8 is deteriorating
Remedy:
This may impact your print quality. If it becomes unacceptable in the future, replace that printhead with a new one. NOTE: This system error appears only after the printhead is out of warranty.
Code: 28.8:02
Description: Matte Black/Red Printhead in slot 8 nearing the end of its useful life
Remedy:
This printhead may have reached a degradation level that prevents the printer from producing acceptable prints consistently. If it becomes unacceptable in the future, run the Clean (Recover) Printhead procedure. NOTE: This system error appears only after the printhead is out of warranty.
Code: 29:00
Description: Maintenance Cartridge almost full
Remedy:
Replace the Maintenance Cartridge.
Code: 29:01
Description: Maintenance Cartridge not inserted correctly
Remedy:
Open the Maintenance Cartridge door on the right-hand side of the printer, make sure that the maintenance cartridge is correctly seated, then close the door. If the problem persists, replace the Maintenance Cartridge.
Code: 29:02
Description: Ink Absorber almost full
Remedy:
Replace the Ink Absorber.
Code: 32:01
Description: Take-up Reel (TUR) communication failure
Remedy:
If you want to continue using the TUR, turn off the printer and check that all TUR cables are connected (sensor cables, printer cable). If not, you may need to unload the paper from the TUR manually. Remember to cut the paper first (either manually or by pressing the Form Feed and Cut key).
Code: 32:01.1
Description: Take-up Reel (TUR) early paper jam
Remedy:
Check there is no obstacle between the Take-up reel optical sensors. Check the paper is attached to the TUR spindle. Check the TUR switch is in the correct position. If needed, use the TUR arrow keys to wind paper before resume printing. To resume printing, press OK.
Code: 32:01.2
Description: Take-up Reel (TUR) paper jam
Remedy:
Check that there is no interference around the TUR optical sensors. Check the paper is attached to the TUR spindle. Check the TUR switch is in the correct position. Check there is no obstacle between the TUR optical sensors. If required, use the TUR arrow keys to wind paper before resuming the print. When the jam is cleared, printing is resumed. Press the OK key to clear the warning message.
Code: 32:01.9
Description: Take-up Reel (TUR) disabled because paper was removed unexpectedly
Remedy:
Remove all paper from the printer and reinstall the TUR.
Code: 32:02
Description: Take-up Reel (TUR) not detected or disconnected while printer was off
Remedy:
Connect the TUR to the printer and press OK to continue.
Code: 36.01:01
Description: Duplexer paper skew error
Remedy:
Unload the paper and try again. If the problem persists, uninstall and reinstall the Duplexer. Make sure that the printer and the Duplexer paper path are well aligned and that there are no obstacles in between.
Code: 36.02:01
Description: Duplexer paper incorrect lateral edge position
Remedy:
Unload the paper and try again. If the problem persists, uninstall and reinstall the Duplexer. Make sure that the printer and the Duplexer paper path are well aligned and that there are no obstacles in between.
Code: 36.03:01
Description: Duplexer unable to detect paper
Remedy:
Unload the paper and try again. If the problem persists, uninstall and reinstall the Duplexer. Make sure that the printer and the Duplexer paper path are well aligned and that there are no obstacles in between.
Code: 36.0:01
Description: Duplexer communication error
Remedy:
Reseat the cables between the Duplexer and the printer. Uninstall and reinstall the Duplexer. If the problem persists, contact the manufacturer of the Duplexer.
Code: 36.1:01
Description: Duplexer not ready for printing
Remedy:
The Duplexer was in the down position when the job was submitted. It must be in the up position before printing starts.
Code: 36.2:01
Description: Duplexer internal error
Remedy:
Reseat the cables between the Duplexer and the printer. Uninstall and reinstall the Duplexer. If the problem persists, contact the manufacturer of the Duplexer.
Code: 41:03
Description: Paper motor electrical current limit
Remedy:
Turn the power off at the rear of the printer and disconnect the power cord. Reconnect the power cord and turn on the printer. Open the Window and check for any visible obstacles restricting the movement of the Drive Roller. If there is a wrinkled mass of paper inside the paper path, lift the Pinchwheels (using the Media Lever) and clear the obstruction. Replace the Media-Axis Motor Media-Axis Motor.
Code: 42:03
Description: Scan-Axis motor electrical current limit
Remedy:
Turn the power off at the rear of the printer and disconnect the power cord. Reconnect the power cord and turn on the printer. Open the Window and check for any visible obstacles restricting the movement of the Carriage Assembly. If there is a wrinkled mass of paper blocking the Carriage Assembly, then clear the obstruction. Clean the Encoder Strip Clean the Encoder Strip. Replace the Scan-Axis Motor Scan-Axis Motor.
Code: 43.1:10
Description: Vacuum Driver PCA communication or hardware failure
Remedy:
Turn the power off at the rear of the printer and disconnect the power cord. Reconnect the power cord and turn on the printer. If the system error persists, replace the Vacuum Fan Vacuum Fan.
Code: 43:01
Description: Vacuum Fan spinning at wrong speed
Remedy:
Turn the power off at the rear of the printer and disconnect the power cord. Reconnect the power cord and turn on the printer. If the system error persists, replace the Vacuum Fan Vacuum Fan.
Code: 43:10
Description: Vacuum Fan failure
Remedy:
Turn the power off at the rear of the printer and disconnect the power cord. Reconnect the power cord and turn on the printer. Check that the Vacuum Fan cable is not damaged and is correctly connected to the Vacuum Driver PCA and to both Vacuum Motors. Check that the Interconnect to Vacuum Driver cable is not damaged and correctly connected to Vacuum Driver PCA and to the Interconnect PCA. Replace the Vacuum Fan Vacuum Fan.
Code: 43:11
Description: Vacuum Fan PCA cable does not seem to be connected
Remedy:
Check that the Interconnect PCA to Vacuum Driver cable is not damaged. Check that the Interconnect PCA to Vacuum Driver cable is correctly connected to the Interconnect PCA and the Vacuum Fan PCA. If the problem persists, replace the Interconnect PCA to Vacuum Driver cable.
Code: 44.1:10
Description: Left Aerosol Fan stopped
Remedy:
Turn the power off at the rear of the printer and disconnect the power cord. Reconnect the power cord and turn on the printer. Check that the Left Aerosol Fan cable is not damaged and is correctly connected to the PrintMech PCA. Check that there is no obstacle blocking the fan. Replace the Left Aerosol Fan.
Code: 44.2:10
Description: Right Aerosol Fan stopped or spinning at lower speed
Remedy:
Turn the power off at the rear of the printer and disconnect the power cord. Reconnect the power cord and turn on the printer. Check that the Right Aerosol Fan cable is not damaged and is correctly connected to the PrintMech PCA. Check that there is no obstacle blocking the fan. Replace the Right Aerosol Fan.
Code: 44.4:10
Description: Right Aerosol Fan Filter blocked
Remedy:
Turn the power off at the rear of the printer and disconnect the power cord. Reconnect the power cord and turn on the printer. Check that the Right Aerosol Fan cable is not damaged and is correctly connected to the PrintMech PCA. If the system error persists, replace the Aerosol Filter.
Code: 45:03
Description: Rewinder servo shutdown
Remedy:
Turn the power off at the rear of the printer and disconnect the power cord. Reconnect the power cord and turn on the printer. Open the Window and check for any visible obstacles restricting the movement of the Drive Roller. If there is a wrinkled mass of paper inside the paper path, lift the Pinch Wheels (using the Media Lever) and clear the obstruction. Replace the Rewinder Motor.
Code: 46:03
Description: Primer servo shutdown
Remedy:
Check that the Primer Arm is not damaged and there are no obstacles in its way. Turn the power off at the rear of the printer and disconnect the power cord. Reconnect the power cord and turn on the printer. Replace the Primer Assembly Primer Assembly.
Code: 46:13
Description: Primer test distance failed
Remedy:
Check that the Primer Arm is not damaged and there are no obstacles in its way. Turn the power off at the rear of the printer and disconnect the power cord. Reconnect the power cord and turn on the printer. Replace the Primer Assembly Primer Assembly.
Code: 50.1:10
Description: OMAS Module communication failure
Remedy:
Turn the power off at the rear of the printer and disconnect the power cord. Reconnect the power cord and turn on the printer. Check that the printer has the latest firmware version. If not, update the firmware to the latest version. Check that the OMAS Controller to OMAS Sensor cable is not damaged and is correctly connected to the OMAS Controller Card and the OMAS Module. Replace the OMAS Module Optical Media Advance Sensor (OMAS).
Code: 50.2:10
Description: OMAS Controller Card communication failure
Remedy:
Turn the power off at the rear of the printer and disconnect the power cord. Reconnect the power cord and turn on the printer. Check that the printer has the latest firmware version. If not, update the firmware to the latest version. Replace the OMAS Controller Card OMAS Controller Card.
Code: 50.3:11
Description: Main PCA to OMAS Controller cable does not seem to be connected
Remedy:
Check that the Main PCA to OMAS Controller cable is not damaged. Check that the Main PCA to OMAS Controller cable is correctly connected to the Main PCA and the OMAS Controller Card.
Code: 50:03
Description: OMAS fatal error or disconnected
Remedy:
Turn the power off at the rear of the printer and disconnect the power cord. Reconnect the power cord and turn on the printer. Check that the Power Supply to OMAS Controller cable is not damaged and is correctly connected to the PSU and the OMAS Controller Card. Replace the OMAS Controller Card OMAS Controller Card
Code: 50:14
Description: Firmware version mismatch between the OMAS Controller Card and Hard Disk Drive
Remedy:
Turn the power off at the rear of the printer and disconnect the power cord. Reconnect the power cord and turn on the printer. Check that the printer has the latest firmware version. If not, update the firmware to the latest version. Replace the OMAS Controller Card OMAS Controller Card.
Code: 51.1:10
Description: Error detected in the Maintenance Cartridge Door Sensor (Service Station Door Sensor)
Remedy:
Check that the sensor cable is not damaged and is correctly connected to the Interconnect PCA. Replace the Maintenance Cartridge Door Sensor Maintenance Cartridge Door Sensor.
Code: 51:10
Description: Error detected in the Window Position Sensor
Remedy:
Check that the Window Position Sensor cable is not damaged and is correctly connected to the Interconnect PCA. Replace the Window Position Sensor Window Position Sensor.
Code: 52:10
Description: Drop Detector switch On/Off failure
Remedy:
Turn the power off at the rear of the printer and disconnect the power cord. Reconnect the power cord and turn on the printer. Check that the Drop Detector cable is not damaged and is correctly connected to the Service Station cable. Check that the Service Station cable is not damaged and is correctly connected to the Interconnect PCA. Replace the Drop Detector Drop Detector.
Code: 53.1:11
Description: Media Sensor cable does not seem to be connected
Remedy:
Check that the Media Sensor cable is not damaged. Check that the Media Sensor cable is correctly connected to the Interconnect PCA.
Code: 53:10
Description: Media Sensor error
Remedy:
Check that the Media Sensor cable is not damaged and is connected correctly to the Interconnect PCA. Replace the Media Sensor Media Sensor.
Code: 54:10
Description: Media Lever Sensor error
Remedy:
Check that the Media Lever Sensor cable is not damaged and is connected correctly to the Interconnect PCA. Replace the Media Lever Sensor Media Lever Sensor.
Code: 55:10
Description: Line Sensor communication failure
Remedy:
Turn the power off at the rear of the printer and disconnect the power cord. Reconnect the power cord and turn on the printer. Replace the Line Sensor Line Sensor Assembly.
Code: 56:01
Description: Incorrect readings from paper encoder
Remedy:
Turn the power off at the rear of the printer and disconnect the power cord. Reconnect the power cord and turn on the printer. Perform Paper Drive diagnostics. Replace the Encoder Disc and Sensor Encoder Disc and Sensor.
Code: 56:10
Description: Paper Encoder calibration failed
Remedy:
Turn the power off at the rear of the printer and disconnect the power cord. Reconnect the power cord and turn on the printer. Perform Paper Drive diagnostics. Replace the Encoder Disc and Sensor Encoder Disc and Sensor.
Code: 61:01
Description: The file format is incorrect and the printer cannot process the job
Remedy:
Turn off the printer using the switch at the rear, and disconnect the power cord. Reconnect the power cord and turn on the printer. Check the graphic language setting of the printer (see the Users Guide).
Code: 61:04.1
Description: The PostScript fonts are missing
Remedy:
Perform a full firmware update.
Code: 61:04.2
Description: PostScript unknown Paper ID
Remedy:
Perform a full firmware update.
Code: 61:08
Description: The paper type specified in the file is incorrect and the printer cannot process the job
Remedy:
Turn off the printer using the switch at the rear, and disconnect the power cord. Reconnect the power cord and turn on the printer. Change the paper type and resend the file to the printer.
Code: 61:08.1
Description: The file cannot be printed because it is password-protected
Remedy:
Resend the file without password protection.
Code: 61:08.2
Description: The file contains format errors or incorrect settings and the printer cannot process the job
Remedy:
Ensure that the file format sent is supported by the printer. Turn off the printer using the switch at the rear, and disconnect the power cord. Reconnect the power cord and turn on the printer. Resend the file to the printer using the Embedded Web Server.
Code: 61:10
Description: A slow computer processing complex files can pause for longer than the default printer timeout, which can be interpreted by the printer as an End Of Job, in which case some elements of the job may be lost
Remedy:
Increase the I/O timeout using the printer’s front panel (see ‘Configure network settings’ in Using your printer). Send the job from a faster computer. Send the job from the Embedded Web Server.
Code: 64.1:01
Description: The printer does not recognize the USB Hard Disk Drive accessory
Remedy:
Turn off the printer using the switch at the rear. Connect the Hard Disk Drive accessory, check that the USB cable is properly connected and turn the printer on. If the Hard Disk Drive accessory is not available (has been lost or broken), proceed to the next step. If the problem persists, turn off the printer using the switch at the rear. Turn the printer on again while pressing Menu, OK and Cancel simultaneously until the front panel asks Printer configured to use External Hard Disk. Do you want to revert the printer to Internal Hard Disk?. Confirm by pressing OK (twice). Remove the Hard Disk Drive accessory (if connected). The printer restarts. After the printer reaches the Ready state, try connecting any other USB device (known to work properly) to the printer port where the Hard Disk Drive accessory should be connected. If a message appears on the front panel reacting to the USB device just connected (such as Please remove USB device or Press OK to…), press Cancel and remove the USB Device. This means the Hard Disk Drive accessory is faulty and should be replaced. See Formatter. If nothing appears on the front panel reacting to the USB device just connected, the Formatter is faulty and should be replaced. See Formatter.
Code: 71:03
Description: Out of memory failure
Remedy:
Turn off the printer using the switch at the rear, and disconnect the power cord. Reconnect the power cord and turn on the printer. If the problem persists, resend the job with one or more of the following options: . Decrease resolution to 300 dpi. Select Economode print mode. . Select Send Job As Bitmap, to have the main processing of the print job done by the computer rather than the printer.
Code: 71:08
Description: Insufficient display list
Remedy:
Resend the job with one or more of the following options: decrease resolution to 300 dpi, select Economode print mode, select Send Job As Bitmap to have the main processing of the print job done by the computer rather than the printer.
Code: 74:01
Description: Error uploading firmware update file
Remedy:
Turn the power off at the rear of the printer and disconnect the power cord. Reconnect the power cord and turn on the printer. Resend the firmware update file to the printer.
Code: 75.21:10
Description: Total printer ink consumption reached upper limit
Remedy:
This is a continuable system error. The customer may continue to print normally but may encounter print-quality issues or ink buildups in the Service Station. To avoid these problems, it’s best to apply Preventive Maintenance Kit #2.
Code: 76:03
Description: Hard Disk Drive out of space
Remedy:
Turn the power off at the rear of the printer and disconnect the power cord. Reconnect the power cord and turn on the printer. Resend the file to the printer. Remove any unnecessary files from the Hard Disk Drive using the Web Server. If the problem persists, perform Hard Disk Recovery (see Hard Disk recovery).
Code: 77:04
Description: Embedded Web Server internal software error
Remedy:
Turn the power off at the rear of the printer and disconnect the power cord. Reconnect the power cord and turn on the printer. Check that the printer has the latest firmware version. If not, update the firmware to the latest version.
Code: 78.1:04
Description:
Media Settings area missing in media settings file
Remedy:
Resend the file.
Code: 79.2:04
Description: Operating-system signal error
Remedy:
Turn the power off at the rear of the printer and disconnect the power cord. Reconnect the power cord and turn on the printer. Check that the printer has the latest firmware version. If not, update the firmware to the latest version. Try to reprint the image using different selections in the driver. Disable nesting and the queue. If the problem persists, perform Hard Disk Recovery (see Hard Disk recovery).
Code: 79:03
Description: Generic firmware error
Remedy:
Turn the power off at the rear of the printer and disconnect the power cord. Reconnect the power cord and turn on the printer. Check that the printer has the latest firmware version. If not, update the firmware to the latest version. If the problem persists, perform Hard Disk Recovery (see Hard Disk recovery).
Code: 79:04
Description: Generic firmware error
Remedy:
Turn the power off at the rear of the printer and disconnect the power cord. Reconnect the power cord and turn on the printer. Check that the printer has the latest firmware version. If not, update the firmware to the latest version. Try to reprint the image using different selections in the driver. Disable nesting and the queue. If the problem persists, perform Hard Disk Recovery (see Hard Disk recovery). For more detailed information, see How to troubleshoot the 79:04 system error.
Code: 81:01
Description: Paper servo shutdown; possible paper jam
Remedy:
Open the Window and check for any visible obstacles restricting the movement of the Drive Roller. If there is a wrinkled mass of paper inside the paper path, lift the Pinchwheels (using the Media Lever) and clear the obstruction. Check that the OMAS Controller Card to PrintMech PCA cable is not damaged. Check that the OMAS Controller Card to PrintMech PCA cable is correctly connected to the OMAS Controller Card and the PrintMech PCA. Perform the Media Drive Diagnostic ( Paper Drive test) to further troubleshoot the error code.
Code: 85:03
Description: Problem finding the Drive Roller zero
Remedy:
Perform the Media Drive Diagnostic ( Paper Drive test) to further troubleshoot the error code.
Code: 86:01
Description: Carriage servo shutdown; possible paper jam
Remedy:
Open the Window and check for any visible obstacles restricting the movement of the Carriage Assembly. If there is a wrinkled mass of paper inside the paper path, lift the Pinchwheels (using the Media Lever) and clear the obstruction. Perform the Scan-Axis Diagnostic ( Scan Axis test) to obtain further information on the problem.
Code: 86:11
Description: Scan-Axis length requires too much force or energy
Remedy:
Check that cutter disengages correctly. Lubricate Scan Axis. Apply Preventive Maintenance Kit 1.
Code: 87:01
Description: Problem with the Scan Axis encoder sensor readings
Remedy:
Check whether the Encoder Strip is dirty. If necessary, clean it. Pay special attention to the area near the Service Station. Follow the instructions on the front panel after selecting the Ink menu and then Clean Encoder Strip.Check whether the Encoder Strip is broken or damaged. If necessary, replace it. If the system error persists, clean the Encoder Sensor. If the system error persists, replace the Encoder Sensor. Perform the Scan Axis diagnostic test to troubleshoot the problem further.
Code: 87:10
Description: Problem with the Carriage Encoder Sensor readings
Remedy:
Check that the Encoder Sensor is correctly connected to the Carriage PCA. Check whether the Encoder Strip is broken or damaged. If necessary, replace it. Check whether the Encoder Strip is dirty. If necessary, clean it. Pay special attention to the area near the Service Station. Follow the instructions on the front panel after selecting the Ink menu and then Clean Encoder Strip. If the system error persists, clean the Encoder Sensor. If the system error persists, replace the Encoder Sensor.
Code: 94:01
Description: The paper is not suitable for color calibration, being too dark (low L), or too coloured (a or b above thresholds), or transparent
Remedy:
If accurate color is important, change to a different paper type (preferably an HP paper type) that satisfies the conditions for color calibration. If accurate color is not important, print without color calibration.
Code: 94:02
Description: Color calibration error: some of the consistency checks on the Embedded SpectroPhotometer (ESP) measurements failed, which could have several causes
Remedy:
Ensure that the paper type selected corresponded to the paper actually loaded. Inspect the CLC printed target to detect any printing defect: banding, missing colors, etc. If an issue is detected, run the Printing IQ Full Calibration procedure to fix any printing problems. Check that color calibration is supported for this paper type: translucent, plain and heavily colored papers cannot be color-calibrated. If the problem persists, try calibrating an HP coated paper (if available). If this calibration fails, replace the ESP.
Code: 94:10
Description: Embedded SpectroPhotometer (ESP) contaminated by aerosol
Remedy:
Replace the ESP Embedded SpectroPhotometer (ESP). Perform the ESP basic test (CLC) to ensure that the replaced part is working correctly.
| Preventive maintenance
Moisture on the printer Users should use the printer in an environment between 20% and 80% relative humidity. To recover from moisture condensation, turn the printer Off, and, using the main roller as a reference, wait until the printer is completely dry before using it again. Noisy Carriage Bushing To prevent noisy movement of the carriage, remove aluminum or dust particles from the bushing at the back of the carriage, and from the slider path along which the bushing moves. Belt Swelling To prevent new belts from swelling incorrectly, keep them in their bags with desiccant until you need to install them. Cleaning the printer To maintain the printer in good operating condition, keep it free of dust accumulation, ink, and other contamination. Cleaning intervals are determined by the printer environment and by the types of printer supplies used.
Ink supplies
The following table lists the Ink Cartridges for the HP Designjet Z6200 Photo printer series.
HP 771 Matte Black 775 ml Ink Cartridge CE037A HP 771 Red 775 ml Ink Cartridge CE038A HP 771 Magenta 775 ml Ink Cartridge CE039A HP 771 Yellow 775 ml Ink Cartridge CE040A HP 771 Light Magenta 775 ml Ink Cartridge CE041A HP 771 Light Cyan 775 ml Ink Cartridge CE042A HP 771 Photo Black 775 ml Ink Cartridge CE043A HP 771 Light Gray 775 ml Ink Cartridge CE044A
Printheads
Description Part number
HP 771 Matte Black & Red Printhead CE017A HP 771 Magenta & Yellow Printhead CE018A HP 771 Light Magenta & Light Cyan Printhead CE019A HP 771 Photo Black & Light Gray Printhead CE020A
SAN BERNARDINO COUNTY | ||
| Adelanto, CA. Alta Loma, CA. Amboy, CA. Angelus Oaks, CA. Apple Valley, CA. Baker, CA. Barstow, CA. Big Bear City, CA. Big Bear Lake, CA. Big River, CA. Bloomington, CA. Blue Jay, CA. Bryn Mawr, CA. Cadiz, CA. Cedar Glen, CA. Cedarpines Park, CA. Chino, CA. Chino Hills, CA. Cima, CA. Colton, CA. Crest Park, CA. Crestline, CA. Daggett, CA. Devore Heights, CA. Earp, CA. Essex, CA. | Etiwanda, CA. Fawnskin, CA. Fontana, CA. Forest Falls, CA. Fort Irwin, CA. Grand Terrace, CA. Green Valley Lake, CA. Guasti, CA. Helendale, CA. Hesperia, CA. Highland, CA. Hinkley, CA. Joshua Tree, CA. Lake Arrowhead, CA. Landers, CA. Loma Linda, CA. Lucerne Valley, CA. Lytle Creek, CA. Mentone, CA. Montclair, CA Morongo Valley, CA. Mountain Pass, CA. Needles, CA. Newberry Springs, CA. Oak Glen, CA. Oak Hills, CA. | Ontario, CA. Oro Grande, CA. Parker Dam, CA. Patton, CA. Phelan, CA. Pinon Hills, CA. Pioneertown, CA. Rancho Cucamonga, CA. Redlands, CA. Rialto, CA. Rimforest, CA. Running Springs, CA. San Bernardino, CA. Skyforest, CA. Spring Valley Lake, CA. Sugarloaf, CA. Trona, CA. Twentynine Palms, CA. Twin Peaks, CA. Upland, CA. Victorville, CA. Wrightwood, CA. Yermo, CA. Yucaipa, CA. Yucca Valley, CA. |
| RIVERSIDE COUNTY | ||
| Aguanga, CA. Anza, CA. Banning, CA. Beaumont, CA. Bermuda Dunes, CA. Blythe, CA. Cabazon, CA. Calimesa, CA. Canyon Lake, CA. Cathedral City, CA. Cherry Valley, CA. Chiriaco Summit, CA. Coachella, CA. Corona, CA. Desert Center, CA. Desert Hot Springs, CA. Hemet, CA. | Homeland, CA. Idyllwild, CA. Indian Wells, CA. Indio, CA. La Quinta, CA. Lake Elsinore, CA. Mecca, CA. Menifee, CA. Mira Loma, CA. Moreno Valley, CA. Mountain Center, CA. Murrieta, CA. Norco, CA. North Palm Springs, CA. Nuevo, CA. Palm Desert, CA. Palm Springs, CA. | Perris, CA. Pine Cove, CA. Quail Valley, CA. Rancho Mirage, CA. Riverside, CA. Romoland, CA. Rubidoux, CA. San Jacinto, CA. Sky Valley, CA. Sun City, CA. Temecula, CA. Thermal, CA. Thousand Palms, CA. Wildomar, CA. Winchester, CA. |
| ORANGE COUNTY | ||
| Aliso Viejo, CA. Anaheim, CA. Anaheim Hills, CA. Atwood, CA. Brea, CA. Buena Park, CA. Capistrano Beach, CA. Corona del Mar, CA. Costa Mesa, CA. Coto de Caza, CA. Cypress, CA. Dana Point, CA. El Toro, CA. Foothill Ranch, CA. Fountain Valley, CA. Fullerton, CA. Garden Grove, CA. | Huntington Beach, CA. Irvine, CA. La Habra, CA. La Palma, CA. Ladera Ranch, CA. Laguna Beach, CA. Laguna Hills, CA. Laguna Niguel, CA. Laguna Woods, CA. Lake Forest, CA. Los Alamitos, CA. Midway City, CA. Mission Viejo, CA. Monarch Beach, CA. Newport Beach, CA. Orange, CA. Placentia, CA. | Rancho Santa Margarita, CA. San Clemente, CA. San Juan Capistrano, CA. Santa Ana, CA. Santa Ana Heights, CA. Seal Beach, CA. Silverado, CA. South Laguna, CA. Stanton, CA. Sunset Beach, CA. Surfside, CA. Trabuco Canyon, CA. Tustin, CA. Villa Park, CA. Westminster, CA. Yorba Linda, CA. |
| LOS ANGELES COUNTY | ||
| Acton, CA. Agoura, CA. Agoura Hills, CA. Agua Dulce, CA. Alahambra, CA. Altadena, CA. Arcadia, CA. Arleta, CA. Artesia, CA. Avalon, CA. Azusa, CA. Baldwin Park, CA. Bassett, CA. Bel Air, CA. Bell, CA. Bell Canyon, CA. Bell Gardens, CA. Bell Flower, CA. Bellmont Shore, CA. Beverly Hills, CA. Bradbury, CA. Brentwood, CA. Burbank, CA. Calabasas, CA. Canoga Park, CA. Canyon Country, CA. Carson, CA. Castaic, Ca. Century City, CA. Cerritos, CA. Chatsworth, CA. City of Commerce, CA. City of Industry, CA. Claremont, CA. Cole, CA. Commerce, CA. Compton, CA. Covina, CA. Cudahy, CA. Culver City, CA. Diamond Bar, CA. Downey, CA. Duarte, CA. Eagle Rock, CA. East Los Angeles, CA. El Monte, CA. El Segundo, CA. Elizabeth Lake, CA. Encino, CA. Gardena, CA. Glendale, CA. Glendora, CA. Granada Hills, CA. Hacienda Heights, CA. Harbor City, CA. Hawaiian Gardens, CA. Hawthorne, CA. | Hazard, CA. Hermosa Beach, CA. Hidden Hills, CA. Hollywood, CA. Huntington Park, CA. Inglewood, CA. Irwindale, CA. La Canada, CA. La Canada Flintridge, CA. La Cresenta, CA. La Mirada, CA. La Puente, CA. La Verne, CA. Lake Hughes, CA. Lake Los Angeles, CA. Lake View Terrace, CA. Lakewood, CA. Lancaster, CA. Lawndale, CA. Lennox, CA. Leona Valley, CA. Littlerock, CA. Llano, Ca. Lomita, CA. Long Beach, CA. Los Angeles, CA. Los Nietos, CA. Lynwood, Ca. Malibu, CA. Manhattan Beach, CA. Mar Vista. CA. Marina del Rey, CA. Maywood, CA. Mission Hills, CA. Monrovia, CA. Montebello, CA. Monterrey Park, CA. Montrose, CA. Mount Baldy, CA. Mount Wilson, CA. Newhall, CA. North Hills, CA. North Hollywood, CA. Northridge, CA. Norwalk, CA. Oak Park, CA. Pacific Palisades, CA. Pacoima, CA. Palmdale, CA. Palos Verdes Estates, CA. Panorama City, CA. Paramount, CA. Pasadena, Ca. Pearblossom, CA. Pico Rivera, CA. Playa del Rey, CA. Pomona, CA. | Porter Ranch, CA. Quartz Hill, CA. Rancho Dominguez, CA. Rancho Palos Verdes, CA. Redondo Beach, CA. Reseda, CA. Rolling Hills, CA. Rolling Hills Estates, CA. Rosemead, CA. Rowland Heights, CA. San Dimas, CA. San Fernando, CA. San Gabriel, CA. San Marino, CA. San Pedro, Ca. Santa Clarita, CA. Santa Fe Springs, CA. Santa Monica, CA. Saugus, CA. Sepulveda, CA. Shadow Hills, CA. Sherman Oaks, CA. Sierra Madre, CA. Signal Hill, CA. South El Monte, CA. South Gate, CA. South Pasadena, CA. Studio City, CA. Sun Valley, CA. Sunland, CA. Sylmar, CA. Tarzana, CA. Temple City, CA. Terminal Island, CA. Toluca Lake, CA. Topanga, CA. Torrance, CA. Tujunga, CA. Universal City, CA. Val Verde, CA. Valencia, CA. Valley Village, CA. Valyermo, CA. Van Nuys, CA. Venice, CA. Verdugo City, CA. Vernon, CA. Walnut, CA. West Covina, CA. West Hills, CA. West Hollywood, CA. Westchester, CA. Westwood, CA. Whittier, CA. Wilmington, CA. Winnetka, CA. Woodland Hills, CA. |